Do you struggle with grout appearance?
It is likely not your cleaning efforts but compromised grout and/or caulk to blame, and continuous cleaning and scrubbing with harsh chemicals will likely make it worse. Sometimes if it is just a small area that needs to be repaired it can stop much bigger problems from arising, but if it was a bad install it will likely need a full re-grout.
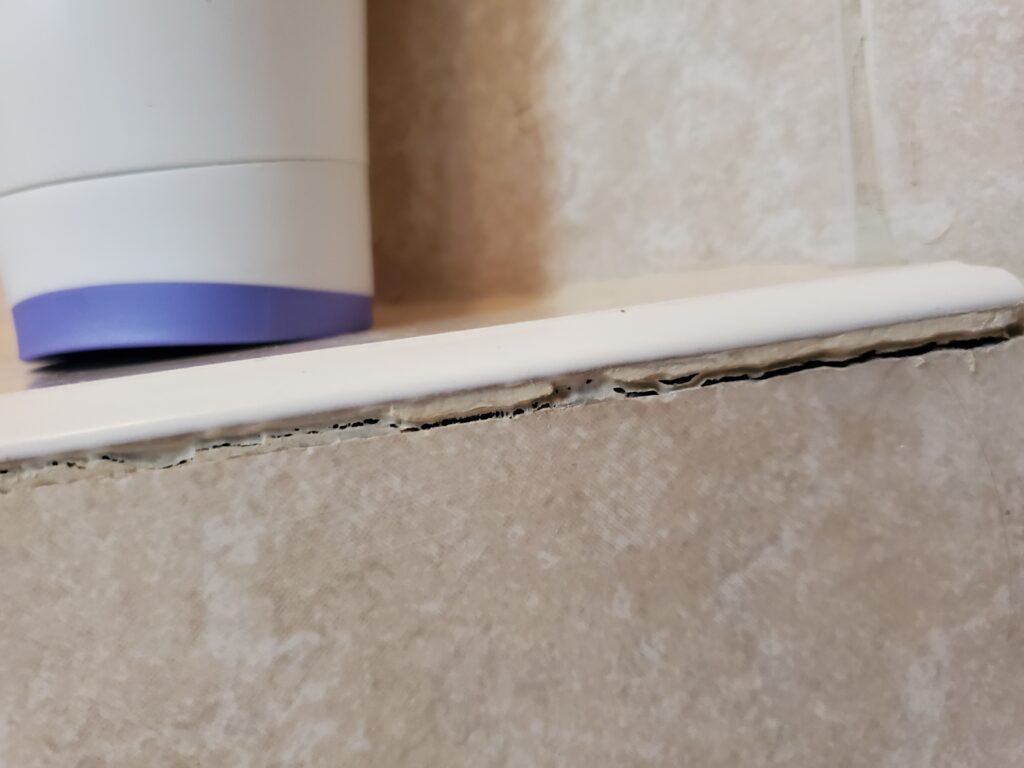
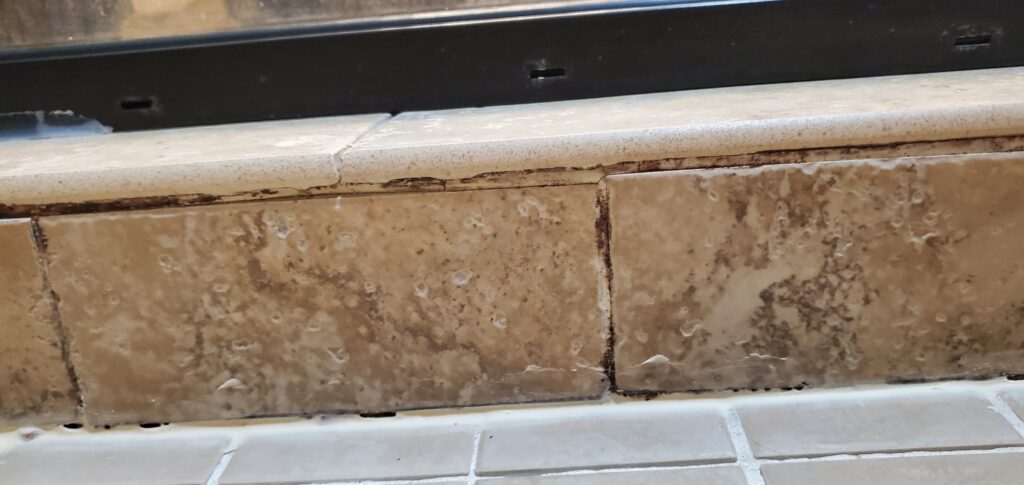
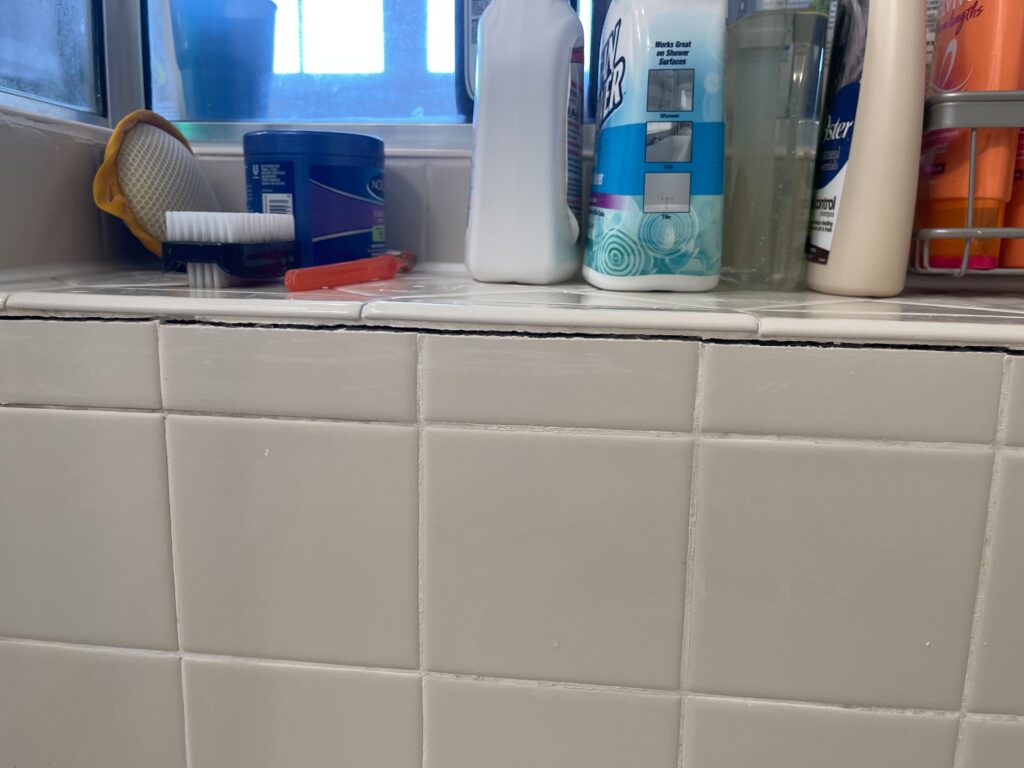
If you are struggling to get your grout clean looking, take a very close look at those areas and you will find small pin holes, cracks and shallow deteriorating grout. These small cracks will absorb moisture into the crack and ultimately into the side of the grout even if there is a sealer on the top surface causing it to stay wet too long or absorb dirty mop water, slowly causing discolorations.
We also come across many dirty looking, what I call jacked floors, that have had been over cleaned with bleach and other cleaners that can alter or take out the original grout color. Then there is the buildup of improper use of sealers, waxes and color stain pens, for the ultimate jacked look. Unfortunately, if someone tells us their floor has been color sealed or color stained or we detect it through testing, it automatically becomes a non candidate for our tile and grout cleaning services as it could become a nightmare can of worms…
Most common grouts.
The most common type of grout we come across is cement based, both sanded and unsanded. Sanded and unsanded are sometimes referred to as wall grout or floor grout, but really has nothing to do with where it’s installed, which one is used is determined by the size of the grout joint. Unsanded for smaller joints (1/8 inch or smaller), joints larger than that will get sanded grout. The sandy aggregate gives the grout strength. There are also grouts that have very fine sand and can be used in most joint sizes, large and small. This fine sand, rapid setting grout, is available from multiple manufacturers such as TEC Power Grout, Home Depot’s Prizm, or Mapei from Lowes. There are also other less common grouts like epoxy-based grouts.
Proper installation is key
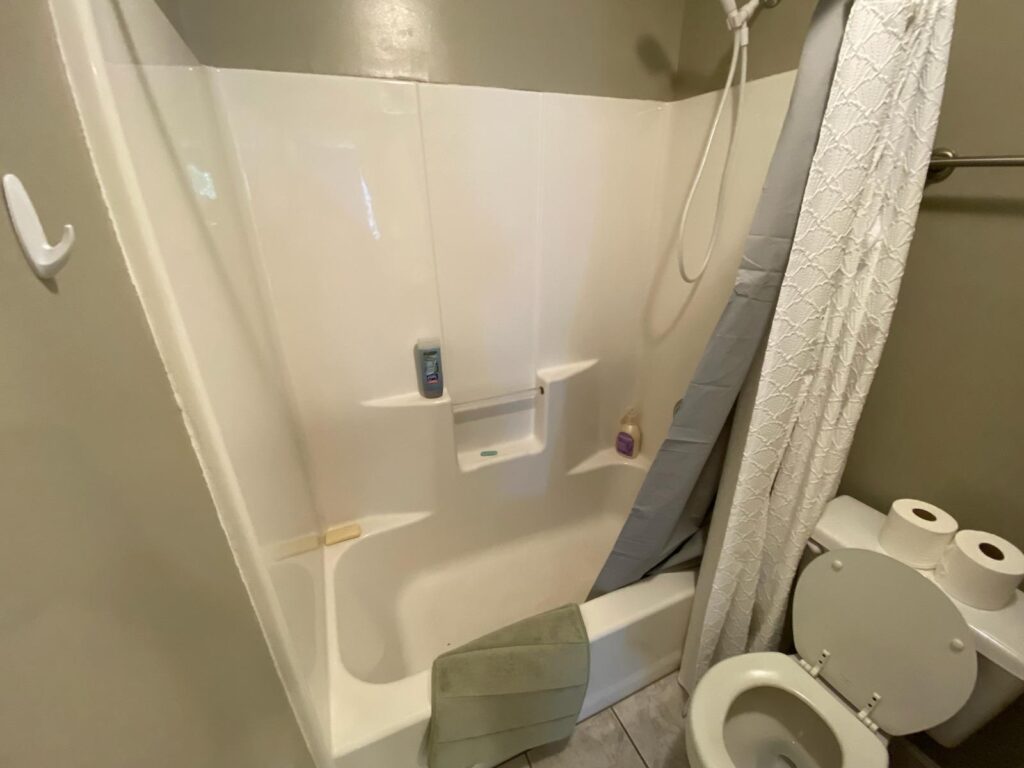
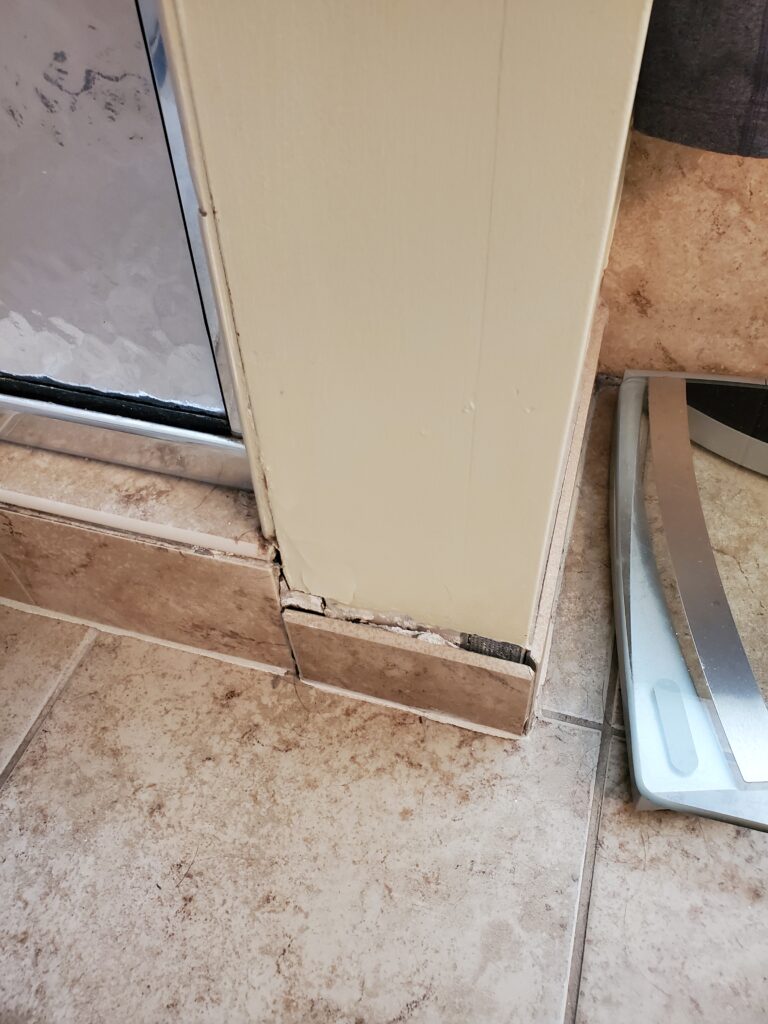
Before the grout is mixed all surfaces must be clean and dry! This is fairly simple with new construction but in the case of our services of re-grouting, it can be a bit more challenging. Moisture that cannot be seen is the biggest problem we face. When grouts and caulks crack or come out it allows water to get where it shouldn’t, causing damage to substrates that sometimes are irreversible. The damage can be found on shower walls, curbs, seats etc… Some showers we see have been continually used with grout in disrepair and leaking into walls, ceilings and floors. causing irreversible damage including mold. If this occurs, a costly shower replacement may be the only option.
If a shower has been leaking water under the tile to the substrate for any length of time, it could take a month or two of no use to get acceptable moisture readings with a moisture meter before new grout is installed or the grout will be discolored while trying to cure properly.
Grouting and caulking are a skill that most are not born with, it takes experience to get good at it. Good meaning properly mixing, slaking, floating, sponging, and cleaning of the haze all at a fast pace. Too much water weakens the grout, too little water makes it hard to float. The temperature and humidity level in a home also plays a role in the installation, we have noticed grout can set up way faster in a dry home making cleanup more difficult if not taken into consideration.
The biggest issue comes from inexperienced installers that use too much water or over work the grout with the sponge and bring too much of the cement out leaving a weak and pitted grout joint. People that are new at grouting tend to get a little panicked when they see the tiles hazing over with grout and want to keep wiping them with the wet sponge, when it’s best to let the grout haze over and then wiped after it has set. You usually have a few hours to get the haze buffed off but could be a big problem if this haze is not buffed off within this time frame, especially with tiles that have texture or pits that mimic travertine. If this happens, and it does because we get called out from time to time with grout haze issues. Often, when installers get called back for grout haze they show up with muriatic acid which does a good job of removing haze but guess what? It also weakens and pits the new grout joints and you don’t want that.
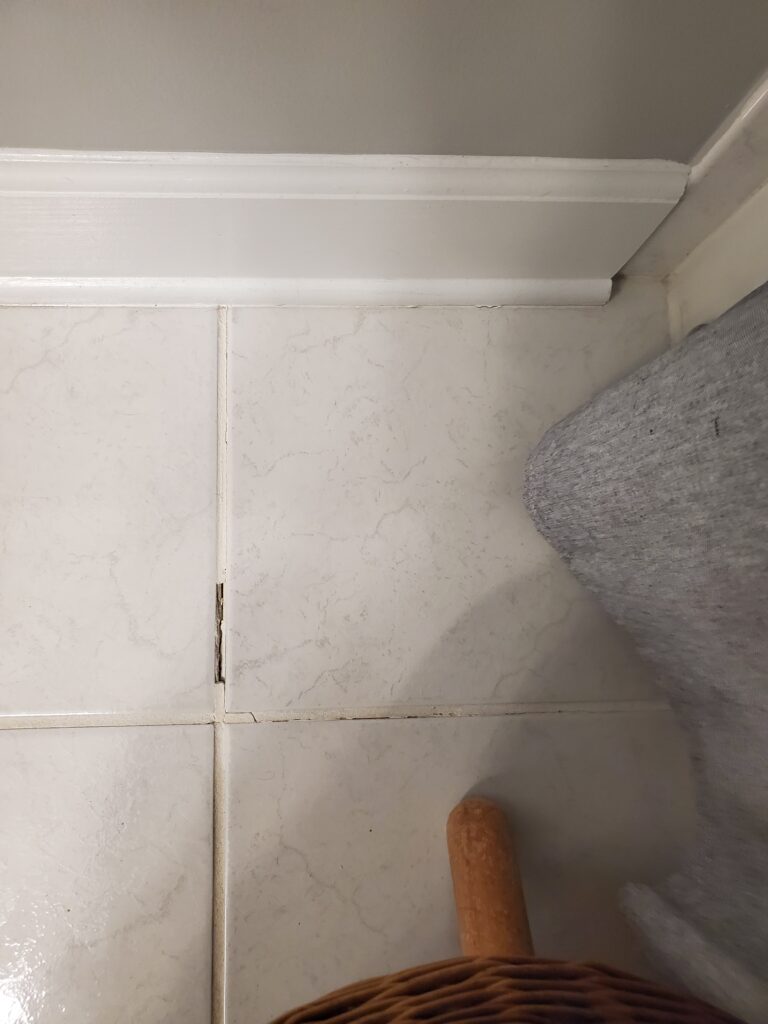
Other important facts about tile installation are that the surface below the tile must be ridged and able to support the weight of the tile floor with little deflection, all backer boards used must be properly glued, screwed, and taped at every seem to create one big solid surface that can all move together. When grout cracks along several rows of tile it’s likely that the seems in the subfloor are moving and likely weren’t taped. If grout is coming out around a single tile it is an indication that the tiles themselves are loose. This occurs when lazy installers don’t butter the back of the tiles during installation. Loose tiles can sometimes be reglued before putting the new grout back.
It is also important to note that when regrouting tiles the old grout and caulk must be removed before installing new grout. The surface needs to be dry and clean of any mold, mildew, body oils and soap scum before putting the new grout and caulk back. Handymen and house flipping hacks will often do a “quick skim coat” to cover unsightly grout. This is never a good idea and you and your inspector should be on the lookout for this while house shopping.
Just because it’s new doesn’t mean it’s right.
As stated above, if an installer isn’t qualified or doesn’t have experience you could have a bad grout job from the get go, and we see this way more than we should. Taking action right away is the best. If you have a new shower in a newly built home or remodel and are under warranty, it’s best to call it in asap. The most common sign of bad grout is chalking. If you rub your finger on the grout and you are getting significant grout on you finger it is slowly washing down the drain, a little residue or haze on a new shower is not uncommon , but should go away. Test for chalking in several areas and don’t let your builder bully you into a small repair if it needs more. They just want to get past the 1 year mark so they can say so sorry. Also note that I have seen bad grout right out of the box, so not always the installers fault but how they handle it is. Every time we do a regrout job we hold the remaining leftover grout in a small wet towel forming it into a baseball. if it’s solid as a rock the next day we have good grout.
Inspection and knowing your colors
It is ultimately your responsibility to inspect your grout regularly, paying special attention to corners, seats, curbs and repair asap or contact the installer to do so. Builders are not coming back to seal or make sure your house is right…to them… no news is good news.
Many people keep their house well maintained in areas that visitors will see such as lawns, gardens, front door, entry ways, kitchen, family room, carpets, flooring and so on. However, it’s easy to neglect the most important things in your home that need attention. In my opinion, that is anything that involves water or can leak. Showers at the top of the list! Then comes gutters, downspouts, drains and other plumbing leaks that can cause very expensive repairs.
Most reputable builders and remodelers will provide you the brand and colors of tile, grout, paint etc…keep this information handy as it could be useful for future touchups and repair. Keeping grout in a tightly sealed container stored in a cool dry place will let it last way longer. Humidity will slowly kill the grout. You can try using stored grout for small touchups but for a full regrout we always start with fresh.
Having grout on hand to make small repairs as they arise is always best. Grout can be easily mixed in tiny batches to fill small holes. Just mix a small amount of grout and water in a plastic cup to the consistency of peanut butter, use your finger to rub into the hole, wait 10-15 minutes and wipe smooth with a damp sponge. After an hour or so buff off any haze with a dry cloth. Trust me when I say it again… filling a small hole fast when it arises is so much easier and less expensive than replacing a failed shower.

Drying and cleaning your shower does help
Most people will sigh or curl their lip when I mention daily shower maintenance. “yeah, good luck getting my kids to do that” is mainly what we hear. However squeegeeing after every shower really helps and it takes me less than 15 seconds, I am fast but that’s all you need. Get 95% of the water down the drain then keep bath fan on for 15 minutes. I also press my finger into my bath towel and wipe the door tracks down just before it heads to the hamper. Always be gentle on corners that may have caulk as rubbing to aggressively will likely compromise the caulk.
Gentle cleaners such as Barkeepers Friend or Bon Ami are better choices over bleach and other harsh cleaners in showers. On floors you want to use no residue cleaners such as Armstrong Floor Cleaner or even a little Dawn dish soap in a gallon of water.
Grout vs Caulk
Some showers have just grout and others will have grout and caulk. A well built custom shower that has no movement or settling can get by with just grout if inspected regularly. This is a better option if possible because it is way easier to keep clean. However, more often than not corners, curb, and seats will crack due to settling or seasonal expansion and contraction. Caulking these corners is usually the remedy but comes with the hassle of having to replace from time to time.
Choosing a shower
We come across many beautiful showers that belong in the luxury homes that we service. But let it be known that the fancy custom showers with seats, nooks, river rock pans, steam shower body jets etc… are just a nightmare to keep looking new. People will drive themselves crazy trying!
The less joints in a shower the better. The common one piece fiberglass shower is the simplest and easiest to install and maintain while the big fancy hand built shower with penny tile on the floor is the hardest. There is just no regrouting possible around hundreds of black penny tiles. They only look good in the magazines. There are other options with less joints like large cultured marble panels or a fiberglass pan with tiled walls. The fiberglass pan with the tiled walls is my favorite to work on and also what I chose in my new home.
In my opinion there are not enough skilled tile setters in this area to build quality hand built pans, when they fail, and they do, it is a costly replacement. Quite often custom built pans are bad from the start, like improper draining/pitch, bad grout/caulk or clogged weep holes for example. We have seen everything. I try to believe that there are many good builds and we just don’t get called for those, but I can’t say for sure.